18 Global Protect and Mapping the Network Server
18.1 Global Protect
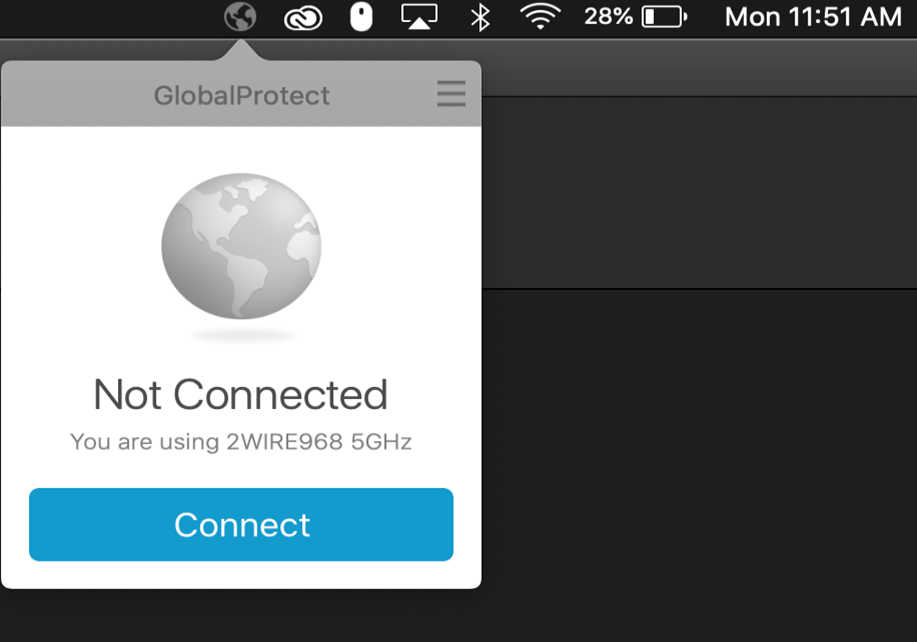
After you install GlobalProtect vis these instructions, connecting is nearly identical on Mac or Windows PC:
Open the GlobalProtect client by selecting the icon at the top of your screen (Mac) or in the system tray (PC). (If it does not automatically appear in this place, access the client through your Finder’s Applications folder (Mac) or Start Menu (PC).)
- If it is your first time connecting, you will be prompted to enter a portal address. The default portal is uwmadison.vpn.wisc.edu.
- If you have used GlobalProtect before, you will be connected to the portal you last used. This can be changed by opening the settings menu on the top right of the client login screen.
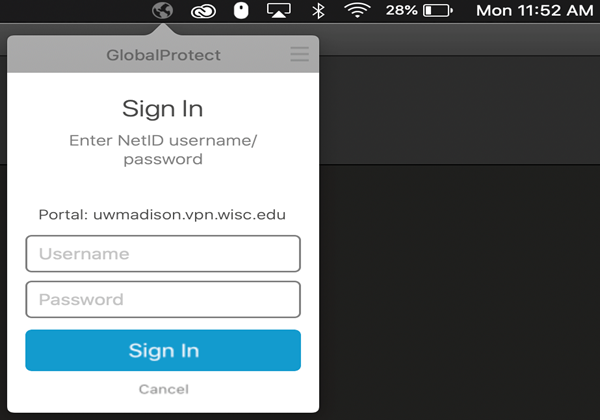
- Enter your netid followed by _1 (to use your Static IP) and password (regular NetID password) and click Sign In. If you are prompted to use Duo MFA, enter the passcode from your fob/Duo Mobile app or enter “1” to receive a push on your mobile device.
18.1.1 Troubleshooting Global Protect on Mac OSX
If the client never connects and just “spins”, this issue could be related to a security setting for the Mac Keychain. Properly restart the computer by clicking restart, and making sure the “Reopen windows when logging back in” is unchecked as shown here:
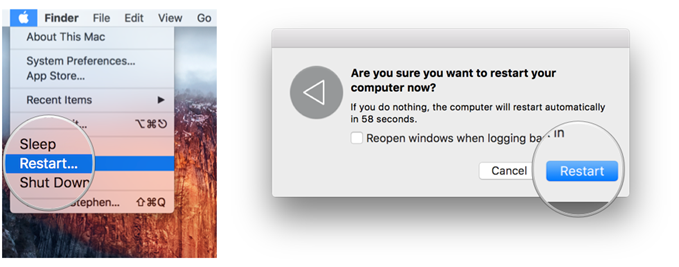
Once the computer restarts and GlobalProtect restarts upon booting back up, there will eventually be a prompt that pops up. It may ask for permission for GlobalProtect to use confidential information from the Keychain. The password should be the computer’s Admin password, or their Apple ID password. Once the password has been entered, click “Always allow”. Afterward, GlobalProtect should be able to move past the “Connecting” phase and will prompt for username and password as usual.
18.2 Connecting to John’s server
18.2.1 Mac OSX:
- After GlobalProtect is connected, open your Finder application: From the top utility bar Click on Go and select Connect to Server.
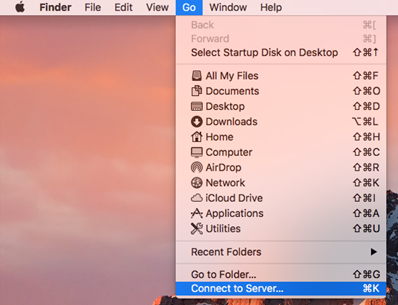
- Enter the server address:
smb://dionysus.psych.wisc.edu/Private
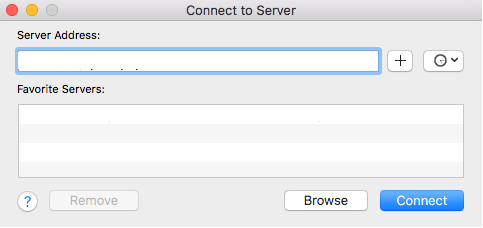
Click on the + (plus) icon to add the server name to your Favorite Servers.
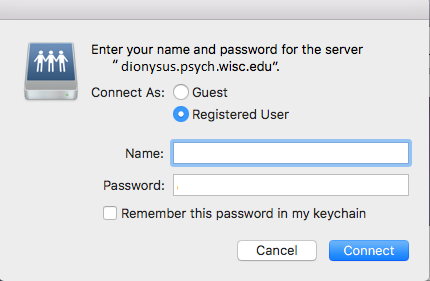
When you are prompted for your credentials be sure to select “Registered User”. Enter your username and password. You can also check to remember this password in your keychain, if you wish.
- Click Connect to continue
18.3 Windows PC:
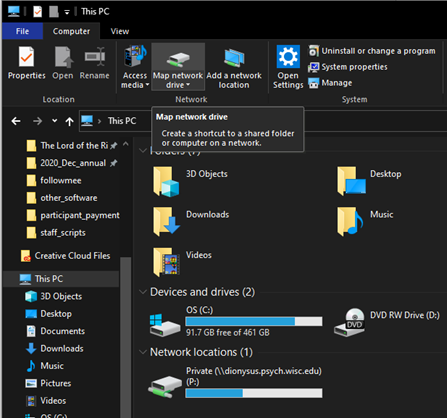
- Open Windows explorer and click on This PC. Under the Computer tab, select Map Network Drive
- In the dialog box, select a drive letter. For the Private drive you want to be sure to use P: as that is referenced in our analysis code.
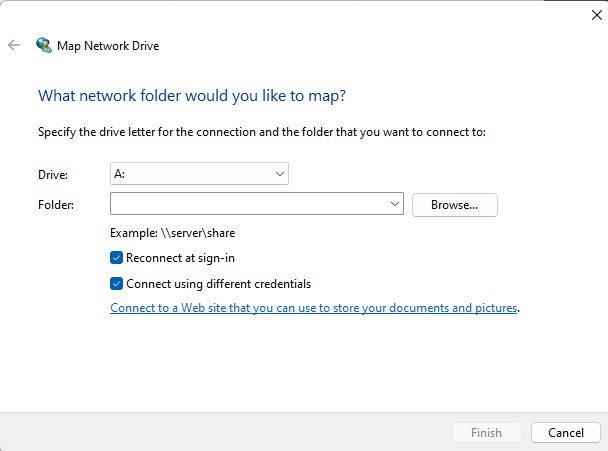
In the Folder box, type the address of the drive you wish to map; i.e.
\\dionysus.psych.wisc.edu\privateCheck “Connect using other credentials” and enter
dionysus\yournetid(no double slashes leading) as the username (use your actual netID), and your netID password.Make sure that “Reconnect at Logon” is ALSO checked and hit Finish